Showing posts with label website. Show all posts

Create social network in your blog


             How about creating a social network just like Facebook,orkut where your friends and users can be talk , share , chat and more within minutes ? I am not kidding .Ning helps you to create social network where your users can sign Up and Login and add friends , just like you do in social networks.

Then How it connects with your Blog . You can connect your blog using iframe.

  • Create a Page in Blogger

  • Make your Post editor in "Edit Html" mode from compose Mode.

  • Now add the below code into post editor.


  • Replace the website with your ning URL and add into your page and Publish.

Use Custom domain name for your Blog


Hope , some times you might be very boring with Long URL of your blog, and likes a short domain.You can easily short this domain by paying some amount to blogger or some private companies who offers domain registration (Godaddy.com).First of all you should have a registered domain . You can also buy one through blogger(Google).


You have to log into the hosting service account which provided you the domain name and create a CNAME (Canonical Name) record for your custom domain.A CNAME, or Canonical Name, record is an entry within the Domain Name System (DNS) that specifies where a user can find your web pages, or any other URL. You’ll use this to associate your custom domain with your blog.Note : If you registered your domain name through Google then you don’t need to create a CNAME record for this.


Creating a CNAME record in GoDaddy.com


GoDaddy.com


1. Log into GoDaddy.com account.


2. Open the Domains tab and select My Domain Names and Domain Manager page opens.


3. Select the domain that you want to use with your blog.


4. Click the Total DNS Control And MX Records link which is at the bottom named Total DNS.


5. Click Add New CNAME Record in the box named CNAMES.


6. For the Name, enter only the subdomain of the address you want to use for your blog. If you picked www.mydomain.com as your address, enter www only here.


7. Enter the Host Name as ghs.google.com and specify a TTL or use the default value.


8. Click OK and then again click ok.


For other hosting services follow the below steps…


  • Log into the hosting service account and go to Managed DNS section.

  • Since CNAME records are special DNS service they may be in sections like DNS Management and Name Server Management.

  • Delete existing CNAME records.

  • If you chose www.mydomain.com as the address, www is the host name.

  • In the value or destination area type ghs.google.com.


Note : Keep in mind that changes to DNS records may take up to 48 hours to take effect.


Update Your Blogger Settings


Everything is over. Now we have to update the Blogger settings.


Go to your Dashboard >> Settings >> Publishing
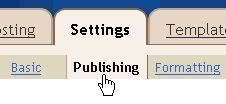

PhotobucketIf you are currently publishing on .blogspot then you will link offering you to switch to custom domain. Go ahead , click it.


Now enter your registered domain name.


Now your .blogspot address(URL) becomes custom domain address.


Add your Blog to Website

  • Register a website with FTP Service 
  • Login into your hosting service you keep your Web site at and create a new file called something like "blog" or whatever else you want it to be called. 
  • Login into your Blogger.com .


  • Go to Settings" then on the link under the tab that says "Publishing". When your Blogger publishing page comes up click on the link that says "FTP". You are now ready to start adding your Web site's FTP information so you can combine your Web site with your Blogger blog.


  •  Enter is the server name that you need to use to FTP something. The server name will look something like this: ftp.servername.com


  • This is the file on your Hosting company where you want to Blog files entered.created this folder enter the address for it here. The blog's address will look something like this: http://servername.com/blog


  • The path for your blog will be the name of the file that you created on your Web site for the blog to live. If you named your new folder "blog" then the FTP path will look something like this: /blog/


  • Create an index file for your blog that will show up on your Web site. 
  • Enter the username that you use when you log into your Web site's server. 
            This was picked by you when you signed up with with your hosting service. Sometimes it's the main part of your Web site's address ie: if your Web site's address is mywebsite.hostingservice.com then your username might be mywebsite
  • Then Enter your Password.
  • When you are finished entering all your FTP information from your Web site click on the "Save Settings" button. Now when you post a blog post on Blogger your pages will show up on your Web site.
Thanks

Create website from Blog


Traditionally, setting up a web site is a lot of work. You have to setup the infrastructure of the website, and you have to provide content for your readers to view. Setting up a blog is a lot easier, but a blog gives you the structure of an online journal, and will include details which may distract your readers.

Sometimes, you want to take a blog, and setup a web site. This is easier than it would seem, if you make a list of the individual tasks.
  1. In Settings - Formatting, set Main Page size to "Show 1 Post".
  2. In the Blog Posts gadget, disable date, timestamp, and other options that make a blog post look like a blog post. Use your judgment here - this is your web site.
  3. Make a post for the home page. Publish it normally, then edit it and change the post date, to fall far in the future, and above any other posts.
  4. Publish additional posts, which will be the other pages in the web site. The "Create" link in Post Editor, and the "New Post" link in the dashboard and navbar, are where you start this process. This is the essential step in getting a reputation for your blog or web site - post something for your readers to read.
  5. Link all of your posts in various ways. Here, you use your imagination.
  6. And, you now have a web site. But you'll never be done, because you have a web site that uses Blogger One Button Publishing, and you'll always find something to work on. I know that I do. This post isn't done, nor will it ever be done.