 Hope , some times you might be very boring with Long URL of your blog, and likes a short domain.You can easily short this domain by paying some amount to blogger or some private companies who offers domain registration (Godaddy.com).First of all you should have a registered domain . You can also buy one through blogger(Google).
You have to log into the hosting service account which provided you the domain name and create a CNAME (Canonical Name) record for your custom domain.A CNAME, or Canonical Name, record is an entry within the Domain Name System (DNS) that specifies where a user can find your web pages, or any other URL. You’ll use this to associate your custom domain with your blog.Note : If you registered your domain name through Google then you don’t need to create a CNAME record for this.
Creating a CNAME record in GoDaddy.com
GoDaddy.com
1. Log into GoDaddy.com account.
2. Open the Domains tab and select My Domain Names and Domain Manager page opens.
3. Select the domain that you want to use with your blog.
4. Click the Total DNS Control And MX Records link which is at the bottom named Total DNS.
5. Click Add New CNAME Record in the box named CNAMES.
6. For the Name, enter only the subdomain of the address you want to use for your blog. If you picked www.mydomain.com as your address, enter www only here.
7. Enter the Host Name as ghs.google.com and specify a TTL or use the default value.
8. Click OK and then again click ok.
For other hosting services follow the below steps…
- Log into the hosting service account and go to Managed DNS section.
- Since CNAME records are special DNS service they may be in sections like DNS Management and Name Server Management.
- Delete existing CNAME records.
- If you chose www.mydomain.com as the address, www is the host name.
- In the value or destination area type ghs.google.com.
Note : Keep in mind that changes to DNS records may take up to 48 hours to take effect.
Update Your Blogger Settings
Everything is over. Now we have to update the Blogger settings.
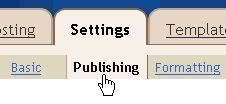
Go to your Dashboard >> Settings >> Publishing
 If you are currently publishing on .blogspot then you will link offering you to switch to custom domain. Go ahead , click it.
Now enter your registered domain name.
Now your .blogspot address(URL) becomes custom domain address.