make-your blog-private-and-unsearchable


make-blog-private-and-unsearchable

Many people write blogs to share their thoughts with everybody and
anybody. However, you may also use your Blog as an online diary,
penning very personal and private thoughts. Like all diaries, you can
either allow a select few persons to view the Blog or allow no one but
yourself the right to view it. Also, you may not want it to be indexed
by search engines, so that people searching for it on the net will not
find it in the search results.

This article lets you know how to
create private Blogs. If your intentions are the exact opposite, and
you want to publicize your Blog to the whole world, follow our other
guides to submit your Blog to Blog Directories, Google, Yahoo and Feed Directories.

First the caveat. These guidelines will only
show you how to make your Blogger blog as private as you can get. As we
shall explain, there is no guarantee that search engine spiders will
never find your Blog because any site that is available on the net will
be crawled by search engines. What we can do is to minimize that
possibility.

Note that these steps are to be taken BEFORE you
create the blog. If you already have an existing Blog, it has in all
likelihood been indexed. These tips will at best prevent future
contents from being seen.

Title and Blog URL

Do not want people
to associate that Blog to you? When you create a new Blog, select a
Blog URL and Title carefully; choose words that have no bearing or
relation to you or what you do. After the Blog is created, DO NOT post.
Post only after you have completed the following steps.

Permission

We
start with the most crucial and essential step. Blogger has made it
easy for you to create private Blogs. When you are logged in, go to
Settings -> Permissions. You can restrict your Blog Readers to only
people you choose or only the blog authors.

People who enter the
Blog URL into their browsers can still see the Blog Title but will be
prompted to enter their Google account particulars and password. If
they are not given the rights to view the Blog, a message will be shown:
It doesn't look like you have been
invited to read this blog. If you think this is a mistake, you might
want to contact the blog author and request an invitation.


While
the contents cannot be seen, people do know that this Blog URL with
that Blog Title exist and it is a private blog. As we had mentioned, if
you don't want anybody to know this Blog is yours, it is important to
have a Blog URL and Title that are not obviously connected to you.

Listing on
Blogger.com


These are the further steps to take, just to
be sure. Under Settings -> Basic, you can see a “Add your Blog to
our listings?” option. Choose “No”. Click “Save Settings” at the
bottom. This will do three things –

i) Your Blog will not appear
when people search Blogger.com.

ii) This Blog will not be shown
in the Blog List on your Profle page.

iii) The Blogger homepage
showcases a list of recently updated blogs but this Blog will not be
shown.

Ping
Setting


Go to Settings -> Publishing and under the
“Send Ping” option, choose “No”. Save the Setting. Whenever a Blog is
updated, Google will notify some of the tracking services of the
updates. If your Blog is private, there is no reason why these services
ought to know of your Blog updates.

Site Feed

Your Blog
contents can be read through your Site's Atom and RSS Feeds. People can
catch up on news and articles by subscribing to these Feeds and viewing
the material using their Feed readers. If you do not want your
contents to be read or syndicated, go to Settings -> Site Feed and to
the question “Allow Blog Feed?” select “None” and click “Save
Settings”.

Meta Tag

Now that we have altered the settings for
the Blog, we can add a further meta tag into our template to tell search
engines not to index the site. Click Template ->Edit HTML and you
can see the source code. Somewhere at the top, just below ,
insert this line (shown in red):-


Leave
this tag there. Search engine robots which visit your site will not
index the Blog pages and contents.

Profile

We thought we
should cover this for completeness. In the top right corner of your
Dashboard, you can go to the “Edit Profile” page. Under “Show my
blogs”, if you see a blog that you do not want people to know about,
remove it from the listing. People who view your Profile will not know
about the Blog. You can also choose not to share information about your
Profile by not ticking the box next to “Share my profile”.

External Links

The
steps outlined above are within your control but this one is not. It
is also the reason why we said we can only minimize but not eliminate
the possibility that people know of your Blog. Anybody can link to your
Blog URL since it is a valid URL. If your friends happen to know about
your Blog and write a post mentioning your Blog or linking to your
Blog, there will be an external link to your Blog. Whatever they write
about it will be public knowledge. Hence, to have an online diary that
only you know about, remember that a secret shared by two persons is no
longer a secret.

Alexa Widget on Blogger


Alexa Rank is a ranking system of your website which bases its ranking on the level of traffic each website receives from the number of people who visit a website with the Alexa toolbar installed.[Click here]


To add the Alexa page rank widget , 


alexa widget for blogger

alexa widget for blogger


+  


add url alexa widget

add url alexa widget


  • Copy Java Script Code for Adding Alexa Widget on your blog,


get codes for alexa widget

get codes for alexa widget


  • Paste on your Blog.

  • Now,Save it.


Now reload your page,and Keep Blogging. :)

Changing fonts and colours of blog

It is now very easy to change the fonts and colors of various things in your New Blogger blog.No need of Html codes and troubles now , easy with mouse . You don't need to tamper with the template. You can do it direct from the LAYOUT.


  • Sign into blogger.com (Dashboard). 

  • Click LAYOUT for the relevant blog.

  •  Then click the FONTS AND COLORS sub-tab. [See the picture below]:


  • If you want to change the font for the Header. Scroll down till you see "Page Header Font". On the right, you will have the radio button to chose the font family and further to the right, you can change the font style to bold or italic. There are also option to change the font size to "bigger" or "smaller"


How To Remove Navbar In Blogger Blogs


In a blog hosted at blogger.com, you would always see a default navbar in the top of the blog page, and it has a search box, flag option etc.


There are a couple reasons why you would like to remove the navbar in your blogger blog -
1. The professionalism of the blog is not maintained. Really, the blog does not look good with the navbar.
2. Sometimes you do nothing wrong, but someone flags your blog through the option in navbar, so you are in risk.


So here is how to remove the navbar in blogger template -


Go to your blog settings > Layout > Edit HTML


Find this -


/* Variable definitions
====================


Above that, paste this -


#navbar-iframe { display: none !important; }


And save the setting. You are done and the navbar is gone! Pretty easy huh!


blogger remove navbar


Add Pages to Blogger like in Wordpress


Many of you might have wanted to use pages for Blogger like in Wordpress.But unfortunately Blogger doesn't provide any thing like Wordpress Pages.But there is still something that can be done.To know what i am talking about,just have a look at my About Page .


To create a Wordpress like page in blogger,we will first create a normal post in blogger.If you don't want this post to be shown in your feed updates,change the date of the post to something very old[may be an year back.See the pic for details] . If you want to prevent users from posting comments on your pages,you can disable commenting on this particular post[see the pic for details]


Now publish your post.We will use this as a pge.You might want to hide the social bookmarking icons and such other stuff from your ‘’pseudo pages’. Actually our bloggertemplate is full of different divisions and we style each of these divisions using CSS.Using CSS rules,it is also possible to hide some of these divisions.So what must we be doing?We need to hide some unwanted divisions on our new pseudo page.


Ok, to Do this find the tag in your template.Just before this,we will add some additional CSS rules to hide those unwanted parts and divisions.We will use the b:if conditions to make the hiding affect our pseudo page only..[so that these rules don't hide these divisions on other pages]

Just before the ,insert the following


Here i have given some list if divisions which should be hidden.If you need to hide any other divisions you can add this to the list but make sure to separate the different divisions using commas.

Increase alexa Ranking


Alexa Rank is a ranking system of your website which bases its ranking on the level of traffic each website receives from the number of people who visit a website with the Alexa toolbar installed. The most important element of any website is content – good quality informative content cannot be beaten when trying to get a good page rank. The more people who visit your website and return or recommend it, the more your traffic will naturally increase.


Below are a few methods that can help to improve your alexa rank :


  • Install the Alexa toolbar on your computer and request that anyone who knows you do the same.

  • Put an Alexa rank widget on your website. Each click can count as a visit even if the toolbar is not used by the visitor.

  • Write an article or blog on Alexa. Webmasters love searching methods to improve their sites. Webmasters are also very likely to have the Alexa toolbar installed. Each visit will increase your alexa rank.

  • Use forums to post messages that include your url. Try and make your post interesting to encourage readers to visit your site.

  • Make use of social networking sites. Get your website Dugg and you could increase traffic. Make sure anything that is Dugg is note worthy.


This Very Helpfull article by : By Tamsin Vines


Other Helpful Sources : http://www.doshdosh.com { 20 Ways ]


Use Custom domain name for your Blog


Hope , some times you might be very boring with Long URL of your blog, and likes a short domain.You can easily short this domain by paying some amount to blogger or some private companies who offers domain registration (Godaddy.com).First of all you should have a registered domain . You can also buy one through blogger(Google).


You have to log into the hosting service account which provided you the domain name and create a CNAME (Canonical Name) record for your custom domain.A CNAME, or Canonical Name, record is an entry within the Domain Name System (DNS) that specifies where a user can find your web pages, or any other URL. You’ll use this to associate your custom domain with your blog.Note : If you registered your domain name through Google then you don’t need to create a CNAME record for this.


Creating a CNAME record in GoDaddy.com


GoDaddy.com


1. Log into GoDaddy.com account.


2. Open the Domains tab and select My Domain Names and Domain Manager page opens.


3. Select the domain that you want to use with your blog.


4. Click the Total DNS Control And MX Records link which is at the bottom named Total DNS.


5. Click Add New CNAME Record in the box named CNAMES.


6. For the Name, enter only the subdomain of the address you want to use for your blog. If you picked www.mydomain.com as your address, enter www only here.


7. Enter the Host Name as ghs.google.com and specify a TTL or use the default value.


8. Click OK and then again click ok.


For other hosting services follow the below steps…


  • Log into the hosting service account and go to Managed DNS section.

  • Since CNAME records are special DNS service they may be in sections like DNS Management and Name Server Management.

  • Delete existing CNAME records.

  • If you chose www.mydomain.com as the address, www is the host name.

  • In the value or destination area type ghs.google.com.


Note : Keep in mind that changes to DNS records may take up to 48 hours to take effect.


Update Your Blogger Settings


Everything is over. Now we have to update the Blogger settings.


Go to your Dashboard >> Settings >> Publishing


PhotobucketIf you are currently publishing on .blogspot then you will link offering you to switch to custom domain. Go ahead , click it.

Now enter your registered domain name.


Now your .blogspot address(URL) becomes custom domain address.


Invite Viewers and Add Event Gadget


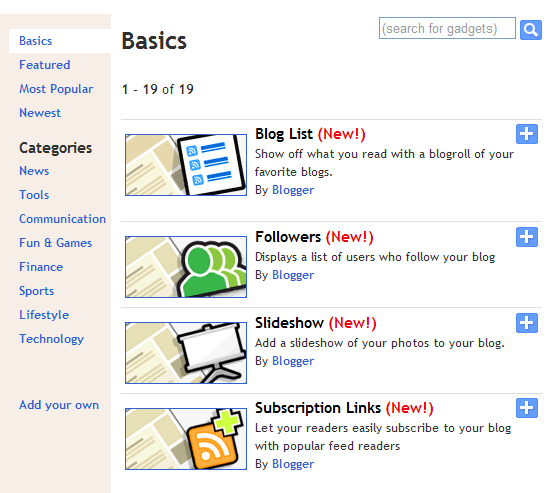
As the
Followers Gadget has been integrated with Google Friend Connect. So now onwards you can  add all the gadgets available in Google Friend Connect to your
blog very easily..


Event
Gadget
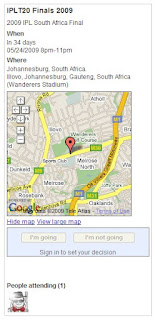
is one of them. It gives information to your readers about any event you decide. The description, time, location, map is included.
Viewers can join the event and see who else has joined the event. See
picture at left. Other gadgets like Members, Comment Wall and Social Bar
gadget can also be added.


:: Follow the Steps to add the event Gadget  ::


  •  Login at Blogger.com and check
    the Remember Me box while doing
    so.

  • Go to Google Friend Connect. You will see all your blogs
    listed in left sidebar under 'Sites'.

  • Click your Blog Title and it
    will expand to show submenu below it.

  • Click on 'Social gadgets' link

  • Click on 'Event Gadget' link.

  • Under Options select and
    choose the various options like Page, and fill in your Event's Title and
    Description. Choose the start and end dates and the Timezone. Fill in
    the Location, address and Media URL which is link of the picture or logo
    of your event.

  • Coose the gadget's size to fit your
    sidebar or you may have to increase
    blog width.

  •  Lastly click Generate Code button.

  • Copy the code given
    and paste
    in a HTML gadget in your blog.

  • Similarly you can
    add any of the other gadgets available like Members gadget and Comment
    Wall gadget. You can see these gadgets in action at top of third column
    in this blog. The social Bar gadget is at the top of the blog.


::  Thanks and Enjoy Blogging  ::

Blogger integrates with amazon

         Now, Blogger adds  a third option: direct integration with Amazon Associates to search Amazon’s product catalog and add links to products that earn you commissions when your readers buy products you recommend with monetize button.

With this feature, you can search Amazon directly from the Blogger editor and add pictures and links to Amazon products right into your posts. Your readers will earn you commissions whenever they buy the products you recommend, and if you don’t already have an Amazon Associates account, you can sign up for one for free without leaving Blogger.

If you’ve ever written a blog post about a book, recommended a gadget, or reviewed a toy you bought for your kids, you’ve likely gone through the process of drafting the post, opening up a separate window to go to find a site that sells the product, then going back to Blogger to paste the link to the product into the post editor.

Starting today, you can search the Amazon product catalog without leaving the Blogger interface and insert links to the products you find into your posts. Not only is the process of linking to products more efficient, but Amazon makes it easy for you to earn money whenever your readers actually buy the products you write about. This is known as an “affiliate program”, and it’s designed to let you recommend products you like to your audience — if they buy the product, you’ll earn a commission on that purchase. (For more on affiliate programs in general, here is a good overview at ProBlogger from this summer, and Darren’s “11 Lessons Learned” post about Amazon Associates is a good review of how to get the most out of the program.)

To get started, click on the Monetize tab for your blog and click “Amazon Associates”. Walk through the setup wizard, and add the Product Finder once you’re done.


Now for the fun part: when you are writing a post on Blogger, you’ll see an Amazon gadget to the right of your post editor (the “Product Finder”). You can search the Amazon product catalog from within Blogger — type in the name of the product you are writing about, and insert a link to the product, an image of the product, or an iframe containing the image, price details and a “buy it now” button. Every link that’s created contains your unique Associates ID, ensuring that Amazon will credit you for any purchases that result from readers clicking the link on your blog.


If you’re an existing Amazon Associate, completing this setup simply makes the Product Finder available on Blogger for you — you continue to earn the same referral rate from Amazon. New Associates receive the same referral rate from Amazon that they would have received if they signed up directly. If you’re not interested in earning a referral, you can still install the Product Finder: from the “Amazon Associates” page under the Monetize tab, click “I'll do this later — show me more Amazon options” and then click “Add the Product Finder” button.


A quick note about trust: affiliate programs work well when readers trust you. You should avoid promoting products simply because of the referral fee you might earn — readers may lose some of that trust if they sense your posts exist solely to make you money. You may also want to disclose to your readers that you will earn a commission on their purchase — some readers even prefer knowing that you benefit from their business.


There’s more information about this integration at Amazon.com, and the Amazon Associates blog has some more details.


 Happy blogging!

How to remove Header Image


  • To change or remove the header Image, you shall go to Layout -> Page Elements and click the “Edit” link at the bottom right corner. Remove/Change  the picture and click on save.


  • If some unlucky , for whatever reason the image cannot be removed, Go to Template -> Edit HTML and scroll to these lines:-


Change the above codes to the below codes  and save the template:-


  • Now ,Go to Template -> Page Elements and you can see a option to Add a Page Element in the Header. 

  • Click the “Edit” link in the Header, select “Remove Page Element”. The Header together with the image will disappear.

  • Reinstate the Header by clicking “Add a Page Element” at the Header area. Near the bottom of the list is the “Page Header” element. (You are entitled to have one Page Header. The previous Header has to be removed before you can add a new one.) 

  • Enter the Title and Description and upload your new picture if you'd like. Save when done. You should see a new Header and/or Header image.


Change order of Archive posts

When you post anything to your blog, your Old posts got back in Archive ,no ?

Yes. But some posts might be important in content, and you might think them to appear at the top in archive. 

Now you have the option to bring back your older posts to the hompage whenever you want.
This is especially useful in seasonal events, when a post written in the past must be present on the homepage. But publishing a new post with the same content will cause content-duplication problems, so you can simply edit your previous post to change the publishing date and bring it back to the top.
So to do this, 


  • open the post-editor and click on Post Options link present in the bottom of the page. 

  • Now Set date and time to present or any future date.


  • Finally save the post and your work is done (You can of course undo the changes, to send the post back to its original place).


Note: URL Doesn't Changes.URL keep the same as Old

Gadget appears on specific page


We do not want the gadget to appear on every page. We want it to appear only on the 'Blog Members' page. For this we use the power of conditional tags. The first step is to get the permalink of the Blog Members post published in Step 1 above. Look in the Blog Archives gadget as the post was backdated. Click the post link to open the post page. Copy the link from the address bar. It looks like this in my example :


http://www.yoursitename.com/2009/12/specified-gadget.html

Then we have to modify the widget code. Login at Blogge.com and click Layouts link on dashboard. Then click Edit Html subtab of Layout tab. Click on Expand Widgets Template checkbox at top of Template Code box. Wait for page to refresh. Scroll down to the code for the Blog Members gadget. It will look like something this :


  • Put in the two lines in bold as shown above. In the first line :
<"http://www.yoursitename.com/2009/12/specified-gadget.html">
  • Put the permalink of your Blog Members post obtained in Step 1. Do not forget to put in the second line :


in exactly same place in the widget code. Save Template. As you can see the Members gadget showing all the present members appears only on this post.

How to install a three column Blog footer

  • Login to your Blogger account.


  • Go to Dashboard > Layout > Edit HTML.


  • Back up your template.


  • Look for the existing footer code near the end of your HTML. It might look something like this:


  •  


    if you already have contents in the footer, the code should be longer.


    • Copy and paste the code below immediately under the footer . This code will create 3 new gadget containers (one for each column) under the existing footer container.


    • Copy the code below and paste it in CSS section, before  ]]>.         


    #new-footer-wrapper

    {

    background: #E1E2B8; margin: 0 auto;width:98%; padding: 0 10px  10px 0;

    }

    #column1-wrapper, #column2-wrapper, #column3-wrapper { float: left; width: 33%;padding: 0px 0px 0px 0px; text-align: left; word-wrap: break-word; /* fix for long text breaking sidebar float in IE */ overflow: hidden; /* fix for long non-text content breaking IE sidebar float */ }

    .new-footer h2 { margin: 0px 0px 0px 0px; padding: 4px 10px 4px 10px; text-align: left; color: #222222; background: #C1C298; font-weight: bold;font-size: 0.9em;}

    .new-footer .widget { margin: 10px 0 0 10px; border: 1px solid #F1F5CA; background: #F7FCDF;

    }

    .new-footer .widget-content { padding: 0px 5px 5px 5px; }

    .new-footer ul { list-style-type:square; margin-left:15px; } 


    • Save the template and go to Layout > Page Elements. You should have the 3 empty footer containers added at the bottom of the layout.

    • You can now drag and drop the gadgets from the existing footer or sidebars into the new footer containers. The end result should look something like this.


    •  If the columns are not distributed evenly, try adjusting the width in line 3 and right margin in line 5 of CSS code (in step 6).

    • Once satisfied with the result, if you want you can go back to the old footer code in step 4 and delete it (from 
       until 
      ).

    Remove-older-post-and-posts-atom-links


    In the default Blogger templates, you might see at the  words  “Newer Post”, “Home” and “Older Posts”. Really these buttons are very helpful to users. But some Blogs are really acting like as Professional websites, that means , they didn't contain these types of links.This tip surely help them.


    • After Sign In to Blogger , Go to Dashboard 

    • Then Click on  Layout 

    • Go to Edit Html and tick mark on  Expand Widget Templates 


    • Find this code in your template code :


    #blog-pager-newer-link {

    float: left;

    }


    #blog-pager-older-link {

    float: right;

    }


    #blog-pager {

    text-align: center;

    }

    After wards  replace with this code:

    #blog-pager-newer-link {

    display: none;

    }


    #blog-pager-older-link {

    display: none;

    }


    #blog-pager {

    display: none;

    }

    Yyou wish to return to the original state, simply reverse the process.

    Thanks :)