Know your online visitors

     Some times we have an anxiety to know about our visitors, and more anxiety to where are they from.Now say bye for you anxiety ,http://whos.amung.us/ helps to know more about your visitors.By using this site you can see where from your visitors , with map,graph and more features. 


Step :

  • Copy the Code from http://whos.amung.us/

  • Paste it into your blog.(Html/Script Gadget)

  • Now you would get a gadget showing your online visitors.

  • Now click on it know more about visitors 

             You can see graph of the week,day and map of your visitors and status etc...Enjoy with your online visitors.By analyzing these graphs and map , you can be analyses and do more traffic.

  •  Hide this Image from Users.

And you can hide this online visitors option from your users .The below code hide the Online users image and replace it with Link "Online Visitors" .


<a href='http://whos.amung.us/stats/you code/'><img border='0' height='0'  
src='http://whos.amung.us/cwidget/code/code.png' title='Blogknol' width='0'/></a>
&#169;2010 Gorkuts.com All rights. <a href='http://whos.amung.us/stats/code/'>
Online VIsitors</a>

Tweet your Post


         What about tweet your posts in blog.Now blogger feeds makes this opportunity for Bloggers.Now you can automatically update your twitter account with latest updates of your blog.For this Follow the Followed Methods..

  • Create a account in http://twitterfeed.com/ with OpenID .
  • Type your Blogger URL address.
  • After Registration you will be taken to new  Page where you can start linking blog feeds to your Twitter account.
  • Click the 'Connect your feed to Twitter Account' button
                        Which will prompt you to enter your Twitter login credentials to authorize Twitterfeed's access. You will get a nice little confirmation once you've successfully linked up your Twitter Account.


  • Enter a name for your feed. 
              If you want to customize your feed's settings you can modify frequency, add prefixes, and even create keyword filters. 
  • click the Create Feed button. 
  • Done!! Twitterfeed is enabled.

Add your Blog to Website

  • Register a website with FTP Service 
  • Login into your hosting service you keep your Web site at and create a new file called something like "blog" or whatever else you want it to be called. 
  • Login into your Blogger.com .


  • Go to Settings" then on the link under the tab that says "Publishing". When your Blogger publishing page comes up click on the link that says "FTP". You are now ready to start adding your Web site's FTP information so you can combine your Web site with your Blogger blog.


  •  Enter is the server name that you need to use to FTP something. The server name will look something like this: ftp.servername.com


  • This is the file on your Hosting company where you want to Blog files entered.created this folder enter the address for it here. The blog's address will look something like this: http://servername.com/blog


  • The path for your blog will be the name of the file that you created on your Web site for the blog to live. If you named your new folder "blog" then the FTP path will look something like this: /blog/


  • Create an index file for your blog that will show up on your Web site. 
  • Enter the username that you use when you log into your Web site's server. 
            This was picked by you when you signed up with with your hosting service. Sometimes it's the main part of your Web site's address ie: if your Web site's address is mywebsite.hostingservice.com then your username might be mywebsite
  • Then Enter your Password.
  • When you are finished entering all your FTP information from your Web site click on the "Save Settings" button. Now when you post a blog post on Blogger your pages will show up on your Web site.
Thanks

Add comment box to your blog

Don't you have comment box in your Blog ?

Want to add comment box beneath your Post.It will help your readers to comment on your evry post after every read.

For this you should do some techniques in blogger.Just Follow me :


  • Dashboard

  • Settings

  • Basic

  • Look on "Comment from Placement" and select "Embedded below post " .


  • Simply go to Layout>Edit HTML in your blog's dashboard and check the "Expand widget templates" box. Then search for this section of code: 

<p class='comment-footer'> <b:if cond='data:post.allowComments'> <a expr:href='data:post.addCommentUrl' expr:onclick='data:post.addCommentOnclick'><data:postCommentMsg/></a> </b:if> </p>
  • Replace this entire section of code with the following instead: 

<p class='comment-footer'> <b:if cond='data:post.embedCommentForm'> <b:include data='post' name='comment-form'/> <b:else/> <b:if cond='data:post.allowComments'> <a expr:href='data:post.addCommentUrl' expr:onclick='data:post.addCommentOnclick'><data:postCommentMsg/></a> </b:if> </b:if> </p>
  • Then save your template. Now when you view a post page in your blog, you should see the new comment form in place!


Update: As many of you have pointed out in the comments, not all templates feature the code I've described above.


Luckily, Is has offered a method which is much easier to use, and has worked for every template I've tried so far. So if my original method isn't working for you, try this instead:


Search for this line in your template code:


<b:include data='post' name='comments' />
Immediately after this line, add the following line of code:

<b:include data='post' name='comment-form'/>
Then save your template. This method adds the required code for the comment form without having to alter the whole comment area, and is very useful if you have experienced problems using the original method Thanks for the hint, Is!


If you don't see your comment form, make sure you have changed this setting through Blogger in Draft and have added your code in the correct place in your template.


You can see this comment form in action beneath this post. Using this comment form allows readers to comment using their Google account, OpenID, Name/URL and all of the settings previously available when using a pop-up or full page comment form (depending on the settings you have chosen).


Please let me know what you think of this new feature by leaving your comments below.

Anonymous comments to your Blog


       If you are getting lots of anonymous comments on your blog it is sometimes annoying. But you can easily disable these anonymous comments. Let's see how -

1. Sign in to Blogger Dashboard >> Settings >> Comments.

2. Look for "Who Can Comment?" option. Select any one option from last three ones. Make sure first option Anyone is not selected. (look following image). Save.


Now you will never get anonymous comments.


          Enable Anonymous Comments


One of my friend Rahul sudeesh from Cochin  told me that he can receive only comments who having google acconts .
So for Enable anonymous comments ,Follow the below Step :

  •  Dashboard
  •  Settings 
  •  Comments
  •  Look for "Who can Comment " ,Select the radio button with " Anyone-Includes Anonymous "
Now onwards every one can comment on you.
Thanks


Note : Please Ensure you are a subscriber of this Blog.Otherwise you shouldn't receive any updated from Us.

Make a homepage to your blog

           Are you ever thought about a sticky home page for your blog. ?Most of us are not ever think about a sticky homepage for our Blog.It makes our Blog more stable and gives  beautiful atmosphere like other paid websites . It is so simple to do a home page for your blog ,where other websites provides large steps for it.

It needs only three steps :

There can be valid reasons when you wish to make a post which sticks on the home page of your blog. Follow the steps below:
1) Go To “Edit Posts” imagefor the post that you want to make sticky.
2) Click on “Post Options”. You will see options as shown in this screenshot.
3) Change the “Post date” to any future date.
4) You are done.
After making a post sticky if you try installing Windows Live Writer. You would get the following error.
The style template used for editing your weblog posts could not be downloaded.You will be able to post to this Weblog, but the editor will not use your blog’s style.
While configuring your blog, WLW makes a temporary post on your blog. Now since you have made one of the posts sticky. WLW would not be able to find the temporary post it has posted and hence will throw the error shown above.
A simple solution is:
  1. Either configure WLW before making your post sticky. OR
  2. Change the date of your sticky post to current date and time. Configure WLW. Change the date again to future.


post a video to my blog

 
Are you crazy of videos ? Want to show your videos to your blog members ?Don't need of youtube and others.Blogger still make it possible to all bloggers .It is very easy to Upload a video to blogger.
If you have a video on your computer, you can upload it to your blog as follows:


Follow this steps :


  • Click the film strip icon on the post editor toolbar.
  • In the popup window, click "Browse" to find the video on your computer.
  • Enter a title for your video.
  • Agree to the Terms and Conditions (if this is your first video upload).
  • Click "Upload Video."


Frequently Asked Questions

Where are my videos hosted?
Videos uploaded through Blogger are hosted on Google Video.

Are my videos indexed or searchable?
No, your videos are kept private and will not be included in Google Video search.

How long does it take to upload and process a video?
Uploading a video may take a while, since videos tend to be very large files. However, the exact amount of time required will depend on the size of your specific video and the speed of your internet connection. The processing stage usually takes about five minutes. Blogger will display a status message below the post editor to let you know how this is going, and there will be a placeholder icon in your post to show where the video will appear.


Remove Navbar

Are you bored with Blogger navbar which contain search blog, share, flag blog, create blog and sign in ?
To remove this banner/navbar,Follow either the written steps nor video Tutorial.

Step :

  • Log in to blogger
  • On your Dashboard
  • Select Layout. This will take you to the Template tab. Click Edit HTML. Under the Edit Template section you will see you blog's HTML.
  • Paste the CSS definition in the top of the template code:

...
<b:skin><![CDATA[/*
-----------------------------------------------
Blogger Template Style
Name:     Rounders
Designer: Douglas Bowman
URL:      www.stopdesign.com
Date:     27 Feb 2004
Updated by: Blogger Team
----------------------------------------------- */
#navbar-iframe {
   display: none !important;
}
/* Variable definitions
  ====================
   <Variable name="mainBgColor" description="Main Background Color"
             type="color" default="#fff" value="#ffffff">
   <Variable name="mainTextColor" description="Text Color" type="color"
             default="#333" value="#333333">
   ...

Remove the code to show it again.

AlertBox-in-Blog

Add a Alert box in Your Blog with a confirmation button.


      If you wanna to announce a new feature in your blog.What will you do for ?Most of us Make the feature at the top of our blog.But,don't you ever think of a alertbox that alert them about our new feature ?If you don't ,Now the time arrives , 
You can have a serious message for sites with adult contents or light message for fun :-

Alert Message and Dialog Box


This post will show you to how to add alert box to your Blog.
Now follow me :
Steps : 

  • Go To Template 
  • Page Elements
  • Add a Page Element in your left sidebar or post body area, and select HTML/JavaScript.

 Paste the code shown below:-
    <script type="text/javascript">
alert('I FOUND NEW HACKING SOFTWARE')
</script>
<noscript>Enable javascript in your browser to view an important message.</noscript>

To insert the alert dialog box, login to your account, go to Template -> Page Elements -> Add a Page Element in your left sidebar or post body area, and select HTML/JavaScript. Paste the code shown below:-

<script type="text/javascript">
confirm('This site contains explicit contents. Are you sure you want to continue?');
if (confirm('This site contains explicit contents. Are you sure you want to continue?')) {
window.location = "http://Blogxool.blogspot.Com/";
}
else {
window.location = "http://www.google.com/";
}
</script>


Your message appears in the red portion. Enter your Blog URL in the bluecolored part of the code. This is where your visitors will go to if they click “OK”. In the orange part, enter the URL of the place to redirect your visitors to should they click “Cancel”.

Alert Box with Prompt field

Another type of dialog box prompts the user to enter some information. For instance, the prompt box can ask the reader for his name and use that to customize the web page. Be reminded that many browsers are configured to disable scripts that ask for information. Have fun customizing your Blog but don't make this a key aspect of the contents. For example, if you have a story that keeps mentioning the name of the reader, the parts where the name should be will appear “null”.

In Template -> Page Elements -> Add a Page Element we add a HTML/JavaScript and paste the following code:-

<script type="text/javascript">
var yourName = prompt("How can we address you?", "Reader");
</script>


The question can be changed. The user will be prompted to enter something in the dialog box. He can of course leave it blank and press “OK” or click “Cancel”.

Alert Message and Dialog Box

Below this JavaScript, in your main body, add another HTML/JavaScript page element. This time, you can type in this:-

Welcome back <script type="text/javascript">document.write(yourName)</script>! Feel free to look around. If you like what you read, mention us in your post or link to this site. Hope to see you again <script type="text/javascript">document.write(yourName)</script>


This is what will appear in your Blog, based on the input that the reader keys in.

Alert Message and Dialog Box

Change the wordings to suit you and wherever you want the reader's name mentioned, add the script (shown in red). Try to phrase the wordings such that if the user enters nothing and clicks “OK”, the blank space is not obvious. A prompt dialog box like this adds a personal touch to your Blog.

Tricks

....Coming Soon...

Scripts


  • Script for Add Alert Box to your Blog
  • Add simple Slide show 
  • Add top bar buttons
  • Add side bar dynamic buttons

Add music to Blog


There are many ways to add music to your blog. The most common way is to embed it into your post, or in New Blogger (formerly Blogger beta), add it as a HTML/Javascript widget via the "Add a Page Element" in the Layout.

You will first have to find a music file that is already hosted on the web, or if you have your own music file stored in your computer, upload it into a file host and then get the URL of the file. If you don't have any music file saved in your computer to upload, you can find files already hosted at freemp3mail.com, select the artist, click "Free Download" and you will be taken to the file hosted on the web. You can copy the URL from the address bar of that page. For example, this is a file already hosted on the web: Josh Aran (Blossom).

In the HTML/Javascript widget window or the post editor window, paste this code:

<embed src="URL of music file"
width="150" height="40" autostart="false" loop="false">

UPDATE 15 November 2007: A blogger commented he/she got error message "The tag isn't closed". No time to test this, but with XHTML (and HTML), opening tags without closing tags are supposed to end with a backslash /. Further, I believe with XHTML, there have to be a space as well. If you have problem, try

<embed src="URL of music file"
width="150" height="40" autostart="false" loop="false" />

and see if it helps. Please give feedback as I have no time to test.


You will have to substitute "URL of music file" with the actual URL of the music file in the script. In the script, there four attributes - width="X", height="Y", autostart="false/true" and loop="false/true". You will have to make sure that the value of width attribute X is consistent with the width of the container in which you intend to add the player into. For example, the width of the sidebar is 160 for this template, so I have to add a value less than 160 if I want to put it in the sidebar. For the autostart attribute, if you put it as true, the music will start automatically the moment your blog is loaded. Many have the opinion that this is a bad choice as the visitor may be visiting your site in the middle of the night when others are sleeping, and may be forced to quickly exit your page to stop the music. If you put the autostart attribute as false, the visitor will have to click the start button to start the music. For example, I have used the "Add a Page Element" to embed an MP3 player at the bottom of this blog Good Hobby Ideas. Try clicking on the start button to listen to the music. For this player, I have put the attribute loop="false" so that the music will stop when it is finished. If you want the music to loop continuously, you will have to put loop="true".

There are other ways of adding music to your blog. For example, you can use this site
Sonific to generate a script for putting into your post (the player will only appear in that post) or the Page Element (the player will then appear in all pages of your blog). You register for an account, verify your email address, sign in, select a songspot, and you will be taken to this page to fill in the field for the blog platform you are using and the URL of the blog you want to put the songspot in (see screenshot below, click to enlarge):

Sonific Songspot configuration page

As you can see from the screenshot, you have various option like orientating the player horizontally or vertically, select the size, whether to start the music automatically or manually, etc. You will also have to select your blog platform (which in our case will be Blogger) and type in the URL of the blog you intend to embed the player into. When you are finished the configuration, click "Activate" and the next page will display the script for you to paste into your post or the Layout. If you paste it into your post, when you try to publish it, you will get an error message "Your HTML cannot be accepted.......". Ignore it, tick "Stop showing errors for this post" and publish.

You can see an example of the player embedded into a post atTesting Sonific. The player will only appear in this particular post. You can also see the player embedded in the footer of this blog. In this case, the player will be displayed in all the pages of the blog.

You can also use Google Gadget to add an MP3 Music Player on your blog. See post Adding a MP3 Player to your blog (click "BACK" button to return to this page).

Get Paid to Write Reviews on Blog


     Even though there are many easy way to make money through our blog,now paid to write reviews on blog.The downside with using Google AdSense and trying to sell private ad spots is your blog must have enough traffic to generate the clicks or page impressions.I guess most of your blog can't get more than 100 visitors per day.so aren't make money from those.If you haven’t heard of writing reviews on your blog to generate a decent stream of income then you might want to check it out.

How does writing reviews make me money?
It’s actually easier than you think. The first step is to sign up with a blog review network and submit your blog. Some of these companies have rules in place like the age of your blog (at least 6 months old, etc), where it’s hosted (blogspot, wordpress, etc), and page rank. They try to weed out spam blog sites which are usually not very old or of good quality. Make sure you read the fine print before you spend your time applying only to find out you don’t qualify.
Assuming your blog is approved, you can now browse the review marketplace looking for reviews to write about or another option is to wait for someone to approach you. I recommend you be the aggressor and sift through the marketplace so you can start making money asap.
Once you find a review you’d like to write about and meet the criteria to qualify, just take it and begin. You’ll create your blog post and follow the requirements of the reviewer, then submit it for approval. After it’s approved, you get paid. Pretty easy huh?


What blog review networks do you recommend?


There are several companies out there who pay you to write reviews on your blog but only two of them are worth talking about in my opinion. They are Sponsored Reviews and Pay Per Post.
sponsored reviews logo
Sponsored Reviews is great because they allow you to search for advertisers directly and bid on jobs. Their bidding system allows you to negotiate rates with advertisers in order to maximize your earnings. They also provide the largest payout of all review networks by only taking a 35% commission for their services. That means you can earn anything from $10 to 500+ for each review. Their user interface is one of the better ones out there and the only drawback to their service is the lack of advertisers. I’m sure it will continue to grow it’s advertising base so they are at least worth a look.
One other perk is their affiliate program. Earn up to $175 per Advertiser and $90 Per Blogger referred. Payouts are based on money spent by the advertiser and money earned by the blogger. See the chart below for payouts. Their average advertiser spends several hundred dollars so most referrals will be worth at least $25 (according to their website).
sponsored reviews payout chart
You’ll then want to put one of their ads on your site or a text link to start taking advantage of their referral bonuses. Can’t hurt to get an ad on your blog right? Get started with Sponsored Reviews now.

payperpost logo
Next up we have PayPerPost which is another great pay for review site. They offer the largest sponsored blogging network with the greatest amount of offers along with a forum where bloggers can post questions, etc. They also pay you a $20 bonus after you complete your first review post. The review post is easy…you just need to write about PayPerPost and they give you $20. Pretty quick way to make a quick $20.
One bad thing I noticed while browsing their marketplace is the restrictions on a few of the reviews. For example, you couldn’t write a review and post it on blogspot.com, wordpress.com, or myspace.com and you must be located in North America, Asia, or Europe only. That doesn’t mean if you have a blogger blog or wordpress blog using your own domain or hosted on your own site you can’t write a review. All I’m saying is make sure you read the review details carefully so you don’t waste your time writing a post only to discover you won’t get credit for it.
They also have a scoring system which might be a barrier to you on some post reviews. It’s usually the higher payouts that are looking for nice reviews from established high ranking sites. They utilize Google Page Rank and Amazon’s Alexa rankings to factor in what your site’s “score” will be.
PayPerPost also offers a referral affiliate program with some pretty nice payouts as well. You will get paid $15 for each referral once the referees first blog posting is reviewed, approved and then finally accepted 30 days later. This means they need to go all the way through the process in order for it to be a legit referral. Again, not a bad payout for just putting a banner or link on your blog. It’s cool because you can see which referrals you currently have signed up and the total amount you potentially could earn (assuming they convert all the way mentioned above).

Summary

If I were you, I’d sign up for both Sponsored Reviews and PayPerPost and see which one works best for you. There is no rule preventing you from having two accounts and writing reviews from both sites and you can promote whichever you choose. That’s what I did and it also gives you a bigger selection of available reviews to write. After you sign up, make sure you get some affiliate banners on your blog so you have another avenue to make money. Just imagine if you write a dozen or so reviews a month and get a couple referrals. You could easily earn a few hundred extra bucks a month for some pretty minimal work!
I wish these sort of sites were available when I was in college because I had tons of free time and needed to make money. I could have easily earned $500+ a month writing a couple reviews a day!
Ready to super charge your blog? Check out our professional premium WordPress themes!
If you like this post then please consider subscribing to our eBlog Templates RSS feed. You can also subscribe by email and have new templates and articles sent directly to your inbox.


change email for blogger login

You can change your old blogger login email to new email id..
If you want to use a different email address, whether gmail or other email address, to access Blogger, all you have to do is to 


  • sign into Dashboard and
  •  click SETTINGS 
  •  PERMISSION
  • and add yourself with the new email address as an author.


A invitation would be arrived in your new email address.Better open it in new browser and accept this.
Now go back to your Blogger account in the other browser where you are still logged in and in the PERMISSION tab. You should see your other email address added as an author. Give yourself admin rights. Now if you are sure that you have added yourself with the new email address, you may remove yourself with the old email address if you wish.
Now onwards you can use the new gmail address to Login the Blogger


Thanks


Create website from Blog


Traditionally, setting up a web site is a lot of work. You have to setup the infrastructure of the website, and you have to provide content for your readers to view. Setting up a blog is a lot easier, but a blog gives you the structure of an online journal, and will include details which may distract your readers.

Sometimes, you want to take a blog, and setup a web site. This is easier than it would seem, if you make a list of the individual tasks.
  1. In Settings - Formatting, set Main Page size to "Show 1 Post".
  2. In the Blog Posts gadget, disable date, timestamp, and other options that make a blog post look like a blog post. Use your judgment here - this is your web site.
  3. Make a post for the home page. Publish it normally, then edit it and change the post date, to fall far in the future, and above any other posts.
  4. Publish additional posts, which will be the other pages in the web site. The "Create" link in Post Editor, and the "New Post" link in the dashboard and navbar, are where you start this process. This is the essential step in getting a reputation for your blog or web site - post something for your readers to read.
  5. Link all of your posts in various ways. Here, you use your imagination.
  6. And, you now have a web site. But you'll never be done, because you have a web site that uses Blogger One Button Publishing, and you'll always find something to work on. I know that I do. This post isn't done, nor will it ever be done.

Search Box

Have a search box on your Blog,that result your postings to readers,Wonder about it  ?
Now,it turns to blog.
It uses Google custom search engine.
With this gadget, your readers will be able to search not just your posts, but web pages linked from your blog, your blog list, and link lists.

To add the gadget, it needs only 3 steps as follows.
Follow the following step:-
1. Go to your blog's Layout page,
2. Click “Add a Gadget”

3. Click on “Search Box.” Configuration is easy: just select which elements you want your readers to be able to search.

Many thanks to the CSE and Ajax Search API teams for their work on this feature. Comments are enabled for this post, so let us know how it works for you!

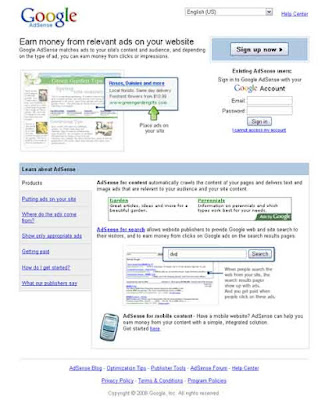
Google adsense in your Blog

It seems easy to sign up for Google Adsense, but it turns out that many fail. Here is a list of explanations Google Adsense


1. visit http://google.com/adsense have any posts Click Here to Apply -> click.


2. It's the Information Website.
a) In the Website URL, write the address of your site or blog. Example: http://name-blog.blogspot.com;
(b) On the website language, select English (use the website in English).

3. There are menu Contact Information:
(a) Account type, select "Individual";
(b) Country or territory, select your country.

4. Payee name (full name), write your full name according to some name ID card or bank account. And the complete contents of the home address, telephone and facsimile (I is not mandatory) in the field below.

5. Policies in the field for signs TIK / check all five boxes do you have as a sign the treaty agree with Google Adsense.

6. In the "Login Information" content of some email addresses will be used to log in / log in to your Google Adsense later when already received; do not forget the password you entered at least seven combination of letters and numbers. For example, number six and one letter or letter of the six numbers plus one. Note: If you have a gmail email, you should use gmail. other email is fine, though.

7. Check again all filled, when ready, click Submit INFORMATION.

8. Finishes .You should wait for approval news from Google Adsense OK. Usually it will take about two to five days.

 Then only your adsense account work properly.
 Note :Terms & conditions  of Google adsense


Enjoy

Show Picture in comment


Blogger Launches another gift for all blogger users,where blogger.com turns his 10 birthday.
Blogging extended embedded comments to display profile images next to the comments that your visitors write. Though profile images have been available with the other commenting options, we are happy to bring them to embedded comments as part of the Blogger Birthday feature series.


From the comment preview, click "Add photo" to upload a photo to your Blogger profile. The next time you comment on a Blogger blog, your profile photo will be displayed next to your comment. 


To enable or disable profile images in your blog's comments, go to Settings | Comments.

We can await another chilling gifts from Blogger.com


Thanks

Add Read more function to Blog

Blogger has supported Read more function -Read more" button that has function to cut off the article on homepage or known as "read morefunction".


It means, to cut off the long article on the homepage to be shorter, you only need to click the button " Jump break " and you do not need to be on the go to type the read more code from any hack.
However, it seems that this button only appears on the new post editor and in the mode "Compose", and does not appear in the mode "Edit HTML". Even though, you cans till use the “ read more function " at old post editor as well as in the mode “"Edit HTML" by typing manually the code:      <!-- more -->


If you use the original template from blogger, you can directly enjoy the feature and the result will appear the text “ Read more » “ like this:


If you do not use the original template from blogger, for instance, you download it from another site, the "Read more function" will still function very well. In other words, your articles will be cut off, but the words “Read more »" will not appear. For this case, you have to add the additional code to your template. The following are the steps:

  1. Please log in to Blogger with your ID
  2. Click Layout.
  3. Click Edit HTML tab
  4. Check the small box next to " Expand Widget Template "


  1. Find the code like:

    <div class='post-body entry-content'>
          <data:post.body/>
          <div style='clear: both;'/> <!-- clear for photos floats -->
        </div>


  2. Copy and paste the code below exactly below the above code:

    <b:if cond='data:post.hasJumpLink'>
          <div class='jump-link'>
            <a expr:href='data:post.url + &quot;#more&quot;'><data:post.jumpText/></a>
          </div>
        </b:if>


    1. Click SAVE TEMPALTE button
    2. Done
    With that way, the words “Read more »" will appear although you don’t use the original template fromblo
    By default, the words to be displayed is “Read more »”, but you can change as you want. Here is the way:

    1. Please log in to blogger with your ID
    2. Click Layout.
    3. Click Page Elements tab
    4. Click "Edit" on "Blog posts" Element.

    5.After new window appears, change the words “Read more” with your own words.


    1. Click SAVE button
    2. Done

    -Thanks to blogspottutorial,forum.