Falling Snow effect to blog


Now make more attraction your blog, by giving falling snows on your blog.

While you browse on you blog, you can feell the falling of snow, leaves, xmas decorations and all.

Its very nice to look.

Yes, Create it now very easily with me.


Step 1: 

         Save and upload to your site one of the following two images (depending on the effect you want), by right clicking the image, and choosing "save as":

snow.gif (256 bytes) (225 bytes)

Step 2: 

         Having done that, simply add the below chunk of code to the  section of your page:

Select All


Be sure variable "snowsrc" in the above code correctly references the full URL path to the image used. Enjoy!


Thanks to : http://dynamicdrive.com


How to block follower on blogger


  • Login to blogger.com and you are at the Dashboard

  • Here, for every blog of you an see followers link if it has minimum one, as you can see in bellow image Technical Details blog has 8 Followers

  • Click on Followers Link for the blog for which you want to block some follower

  • It will show list of followers as shown in bellow image


Now click on the picture of the follower which you wanted to block

  • This will show updates and links of follower as well as link for blocking the follower

  • Click on Block This User Link and follow the steps and the follower gets blocked from following your blog.

  • If you don't want block the follower but add as a friend then click on Add as friend as shown in the above image


Redirect from one blog to another


Suppose, i have two blogs with not bad amount of  visitors ,But i can't manage them, so i would like to make it out one.So i need a redirection purpose.That means if any one enter into my old blog, he will automatically redirect into my new blog :) how is it ?


So, how to do this?

     If you are using a NEW BLOGGER TEMPLATE, do this:-

1. Go to  blogger dashboard.

2.Click on the layout link> Edit html

3.Copy the below html code and Paste it anywhere between the head tags.[look at the below screenshot]


Don't forget to replace the newblogaddress in the code with your destination url(address)


4.SAVE THE CHANGES.


             If you are user of  CLASSIC BLOGGER TEMPLATE,Just follow this:-

1. Go to  blogger dashboard

2. Click on the template link next to your blog name.

3. Copy the below code and paste it below the head tag as shown in the below screenshot


Don't forget to replace the newblogaddress in the code with your destination url(address)


4. Save Changes.

Add your blog feed to your facebook profile


We're kicking off our video series with a quick tutorial on how to add your blog's feed to your Facebook profile. That way, every time you publish a new blog post, Facebook imports it as a Note and notifies your Facebook friends. Hosted by me (Andy) your in-residence TypePad scientist:


Buy aStorage space for blog


What would you do  if your Blog space exceed from the limit ?

Create another blog?

But,its quite difficult to manage those two blogs,

But now Blogger.com comes with its solution.


Now more, you can buy Free space for your blog.

There are many plans for you,You can choose any one of them that suites you.

Visit here to buy the space:   https://www.google.com/accounts/PurchaseStorage

Post via email


 If you are far from computer and your blog, don't be worry, Take your mobile phone and have blogging,with most easy and safety method.

Blogger introduce Mail-to-Blogger Feature.

To post your blog,you need to configure your Mail-to-Blogger email address.Then onwards you can have blogging on your Mobile itself.

The Mail-to-Blogger feature turns any email account into a blog-posting application.

  •  In Settings | Email you can create a Mail-to-Blogger address which you will use to send posts via email to your blog:


Settings | Email tab
  • To post to your blog via email, you need to configure your Mail-to-Blogger email address in Settings | Email:


  • The format of the email address is username.secretword@blogger.com. Note that this email address must be kept secret. Otherwise, anyone who gets it will be able to post as you.


Also be sure to specify whether or not you prefer your email posts to publish automatically. If this option is not checked, then your posts will be saved on your account but will not appear on your blog until you log in to Blogger.com and publish them yourself.

Once you have saved your Settings, you can send email to your blog. The subjects of your email letters will be the titles of your posts, and the body of the emails will be the posts themselves. To include an image in your post, you can attach an image to you your email.

  • Notes: Sometimes email programs append text to the bottom of each sent message; to make sure this cruft doesn't get posted to your blog, put #end at the end of your post.

    Post to my blog


    • Go To www.blogger.com 

    • Once you've logged into Blogger you'll see your Dashboard, showing your list of blogs. 

    • Click the blue 'New Post' button to create a new post:


    Screenshot: Blog List

    • Next, you'll see the Create New Post page. Start by giving your post a title (optional), then enter the post itself:


    Creating a new post

    • When you're done, click the "Preview" link to make sure it's ready to go:


    Previewing a post

    • Once you're satisfied with your post, click the "Publish" button. This will publish your new post:


    Publish your post

    Image from photobucket to blog

    Upload your image to a  photo hosting website like Photo Bucket.com. With Photobucket, you can upload photos as well as videos, and you can blog direct from Photobucket.


    First of all You should create an account in photo bucket.After you have uploaded your photo to Photobucket, you can use the <img src="photo URL" width="W"> tag to publish your photo to the blog, where W is the width of the photo you want displayed in your blog, or you can blog direct from Photobucket. If you take the first alternative, you will need the URL of the hosted photo. This you can get from your Photobucket account. See screenshot 


    Post pictures to blog


    Now its very easy to upload pictures to your blog .Better use new updated Editor for more functions.

    Yopu can upload picture with three touch !!.Yes.

    You can now upload photos to your blog(s) using Blogger Images;


    • just click the image icon in the post editor's toolbar.


    When you click this icon, you'll get a window that allows you to select an image or multiple images from your computer.


    • Click the Browse   button to locate the ones you want. Alternatively, you can enter the URL of an image that's already online and insert it into your post.


    If you click the link to choose a layout, you can customize the way your images will appear in your post:

    The left, center and right options determine how the text of your post flows around the pictures.

    The size option lets you scale the pictures to different sizes within this posting area. Note that the picture will still be uploaded in its full size; this option just determines how it's scaled within the content of your post.

    Label Your Post


           Label helps you to categories all your posts.It makes your visitors to catch the topic very easily,when they are enough posts.

    Add Label to your Post : 


    • When you're writing a post, you'll have a space at the bottom of the form marked "Labels for this post." 

    • Enter whatever labels you like, separating them with commas. You can also click the "show all" link to display a list of labels you've used previously. 

    • Then just click on the labels to add them.


    • When you publish your post, the labels will be listed with it. 

                 Clicking any of the labels will take you to a page containing only posts with that label.


    Advanced Use

           You can easily change the formatting used here by editing your blog's layout. You can also add a list of all your labels in the sidebar of your blog, sorted alphabetically or by frequency of use.


        Labels are handy if you blog about a lot of different subjects, since readers can then choose to view all of your posts on, say, dancing at once. Or politics, or knitting, or whatever you happen to be writing about. If you have a team blog, you could also give each member their own label, so you could easily read all the posts by any one of them. Feel free to come up with other creative new uses as well!


     The following characters cannot be used in labels: &<>@!,

    Subscript and superscript in blog post

    Today my friend tito dutta asked me about superscript and sub script in Blog posts.

    It is very sad to say that there is no icons in blogger new updates Editor.

    But by using some html Codes, it can be possible in Your blog.

    Few of us may not know what it is, For those ,

    What is super scipt ?

    Example : 

     18 th  - this is an example for supper scipt .

    What is Subscript ?

    Example :

    18 th This is another example for Subscript


    To Add this on your Post.

    •  Make your editor in "html Code" 


    (* Sorry for this Low Quality picture ")


    • Change the "TEXT" and paste your text which you wanna be a super script or be a sub script

    Enjoy .


    Recent Posts in blog

    Have you thought about about the recent posts shown in my side bar.

    My friend hiouyt thought that , it is an html code , that i should manage it every day.

    its quite funny to me more.


    Actually it is a gadget provide by Blogger team itself.

    To add this gadget ,


    • Sign in Blogger.com (Dashboard) 

    • Go to Layout 

    • Select Page elements 

    • Click on " Add page elements  " (See Fig : 1.1)


     ( Fig: 1.1 )

    • A popup menu will be appear on the screen (Fig 1.2)


    ( Fig: 1.2 )


    • Select ' More Gadgets "  on the popup menu .


    • Click on "RECENT POSTS " .

    • Done !!


    Now , Re-open your home page.

    Woow.Enjoy

    Have a nice day 

    Create a Blogger Feed


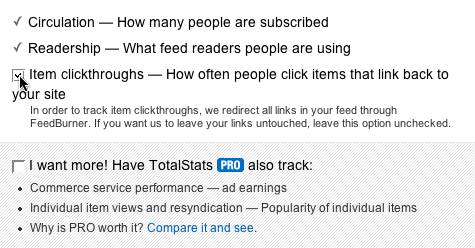
    1. Enter your blog's web address in the "Ready to Burn?" form found on FeedBurner's homepage and at the bottom of the pages in the Blog and Podcast sections. If you plan to publish a podcast with your Blogger feed, check the "I am a podcaster" box. Click Next ».

    2. The Identify Feed Source page should appear.


    3. On "Welcome", make sure the title and FeedBurner address (URL) of your new feed are values you prefer.


      The Create or Sign In To Your FeedBurner Account page should appear.


    4. Also on this page, create a FeedBurner account by picking a username and password and supplying your email address.

      When you've supplied all the required information on this page, click Activate Feed ». A "Congrats" page should appear.


    5. Read all of the information on "Congrats", then click Next » to continue with the setup process.


    6. If you selected "I am a podcaster" on the homepage, configuration options for our SmartCast service will appear. Here you can supply categories and other information for iTunes, append a copyright message, and submit your podcast to Yahoo! Search.


      When you are finished, click Next ». Configuration options for FeedBurner stats services should appear.


    7. On the stats configuration page, select the level of feed stats detail you want.


      Click Next » to finish the setup process and enter our feed management interface.

      You're now ready to make your FeedBurner feed available on your Blogger site!


    Tracking 100% of your feed traffic: Redirecting your Blogger feed to your FeedBurner feed

    Blogger can make sure all feed traffic for your blog content goes to your FeedBurner feed. This ensures your FeedBurner stats are comprehensive and accurate; even subscribers to the 'Original Feed' are routed through FeedBurner. To redirect your feed:

    1. In a new browser window, sign in to your Blogger account.


    2. From the Blogger Dashboard, click the Settings link for the blog you want to promote.

      The Settings page for your selected blog should appear.


    3. Click the Site Feed link under the Settings tab.


    4. Type your complete FeedBurner feed address into the Post Feed Redirect URL text field. Make sure you type in your entire feed address including the "http://" portion.


    5. Click Save Settings.

      You should see the message "Settings were Saved Successfully".


    6. Blogger will now redirect all feed traffic for your blog to your FeedBurner feed.

      Note: If you are using the redirection feature within Blogger to send all of your feed traffic to your FeedBurner feed, you may want to modify the code we provide in order to keep your subscribers with you, even if you leave FeedBurner.


    Solution for spam appeal

          Is your blog is spam labelled , or is it not shown now a days ? .We found that many blogs are blocked as spams blog.Now blogger team are very strict in these area.Some of my friends seen that "Return to Blogger" error while they try to open their Blog.To solve this problem,                                                                                      

     You should take a request to blogger Team.

    Paste this to URL


    Thanks